KNOWLEDGE · MATERIALS & CONSTRUCTION · 29 OCTOBER 2026
Practical answer
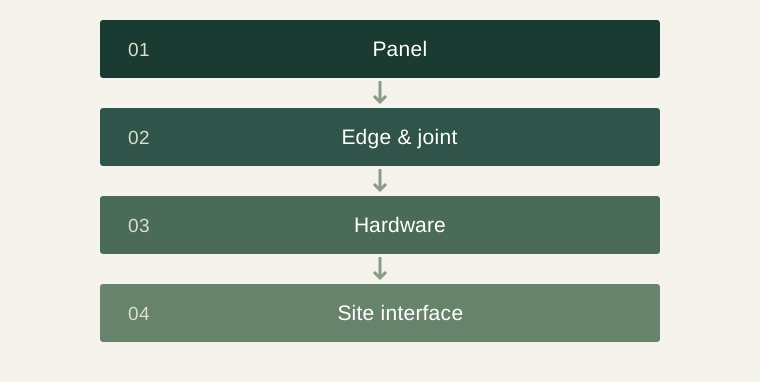
Treat a kitchen cabinet as an assembly rather than a single material label. Specify the box, front, back, shelf, hardware and exposed edges separately. Then connect the assembly to drawings, sample references and the way it will be installed. This makes a plywood, fibreboard or solid-wood proposal easier to assess without assuming that one word establishes the quality of the complete kitchen.
Start with the component, not the sales description
A quotation that says wood cabinet does not identify every component. The front may have one construction while the cabinet box and back use different materials. Record the component, substrate, surface finish and edge treatment in separate fields. Ask which visible surfaces are finished and whether the interior uses the same finish as the outside.
The USDA Wood Handbook distinguishes solid wood and wood-based composite products; it does not establish the performance of a particular supplier’s cabinet. Use that distinction to ask better questions, then evaluate the actual product documentation. A clear component list is more useful than an unsupported premium or waterproof label.
Read joints as part of an assembly
The connection between panels matters alongside the panel choice. Ask how the box is assembled, how the back is retained and how shelves are supported. A photograph of a closed cabinet hides these interfaces. Request an open view, an assembly drawing and the installation instructions for the proposed construction.
For shipped flat-pack products, establish which connectors are included and which tools the installer needs. For assembled boxes, ask how they are supported and protected in transport. Neither shipping arrangement is automatically superior: the practical choice depends on factory preparation, package size, destination access and the skills available for installation.
Resolve exposed edges and cut-outs
Sink cabinets and appliance openings deserve a dedicated review because factory-finished panels may be cut again on site. Identify edges around plumbing, service holes, plinths and worktop junctions. Ask the supplier and installer how each exposed area is treated after cutting. Avoid equating a water-resistant panel description with a completed waterproof assembly.
Keep the project’s moisture strategy separate from the appearance sample. The colour swatch establishes a finish direction; it does not show every seam or penetration. Include a small drawing or photograph that identifies the edge condition the installer is expected to reproduce.
Connect the box to hardware and worktops
Drawers, hinges and internal fittings impose their own geometry and fixing requirements. The cabinet maker should match the selected hardware to the actual box dimensions and front arrangement. A substituted runner may change clearances or installation details even when its advertised function sounds similar.
Worktops, appliances and sinks also introduce independent support and service interfaces. Give the kitchen designer the final appliance information before approving the cabinet elevations. Resolve where panels, support rails and service access are needed with the responsible designer or installer; do not let a decorative rendering become the sole production document.
Use a first cabinet as an approval object
For a large or repeated order, an agreed representative cabinet can expose issues that a material chip cannot. Select one with a drawer, a door and a visible edge. Review the internal finish, edge treatment, gaps, operating motion and assembly information together. Record what was checked, what remains open and which sample is retained.
A sample cabinet is useful only when the approved details transfer into the production schedule. Photograph its identifying label, record its revision and list any exceptions. If the production version changes, obtain a written description of the change before treating the earlier sample as current approval.
Inspect against the approved schedule
Before packing, compare item references, dimensions and selected finishes with the final order. Check the agreed visible surfaces, the operation of moving parts and the presence of installation components. Separate a missing part from a cosmetic disagreement so the report can identify an appropriate response.
Retain the inspection report with the cabinet drawings and packing list. The destination installer should be able to find the cabinet reference without translating an informal sales nickname. A consistent identifier makes it possible to locate a replacement front, identify the correct hardware or explain an installation question after delivery.
Compare load paths and replaceable parts
Cabinet construction has to accommodate more than the weight of the empty box. Stored contents, moving drawers and supported surfaces introduce different actions. Ask the maker to identify the intended use of each component rather than assuming that a stronger-looking panel compensates for every connection. Shelf support, the attachment of hardware and the support of a worktop are different details. Their suitability must be established for the actual assembly.
A useful comparison also considers repair. Ask whether a damaged front, adjustable shelf, hinge or drawer component can be replaced without changing the whole cabinet. Retain the item and hardware references that make this possible. An attractive seamless appearance can still be compatible with serviceable components, but the arrangement needs to be explained rather than assumed.
For a remote purchase, separate information that can be reviewed from documents from information that needs a physical sample or inspection. Drawings can establish the specified arrangement; an identified sample can demonstrate a finish; a check of the ordered products can record their condition at a stated stage. Each evidence type answers a different question. Keeping those questions separate produces a clearer decision than asking one photograph to prove the material, workmanship, operation and installation suitability at once.
A specification checklist
| Part | Record before approval | Useful evidence |
|---|---|---|
| Cabinet box | Substrate, finish, joints | Assembly drawing and sample |
| Front | Construction, finish code, edge detail | Approved front sample |
| Hardware | Exact model and application | Manufacturer data and schedule |
| Site interfaces | Services, supports and fixing responsibility | Reviewed installation drawing |
Illustrative approval example
A buyer compares two apparently identical grey kitchens. One offer lists only the door colour; the other identifies the box material, interior surface, drawer system and sink-cabinet cut-out treatment. The buyer asks the first supplier to complete the same fields before comparing totals. A sample base cabinet then reveals that the selected handle conflicts with an adjacent drawer. The drawing is revised before production, and the accepted change is recorded against the affected cabinet references. This is a planning example, not a report of a tested product.
Questions buyers ask
Is plywood always better than fibreboard?
A material name alone does not settle the choice. Assess the specified product, component purpose, joinery, finish and installation conditions together.
Does a moisture-resistant board make a waterproof kitchen?
No. Joints, edges, penetrations and site conditions remain part of the finished assembly.
Can a supplier change a hardware model after approval?
Use a written substitution process that explains the new model, changed interfaces and any revised approval requirements.
Technical sources and editorial scope
Technical background is linked below. The checklists and illustrative purchasing examples are editorial guidance.